q61.org :: ChibiMo the Mini USB Monitor :: Build
日本語のページはこちら
version. 2011.06.21
Build your own USB monitor
On this page is a step-by-step instruction to build ChibiMo the mini USB monitor with an Arduino motherboard.
Software for ChibiMo will be updated on this page as well, so get updated with this feed.
What You Need
- Arduino UNO, Arduino Duemilanove or Arduino Diecimila
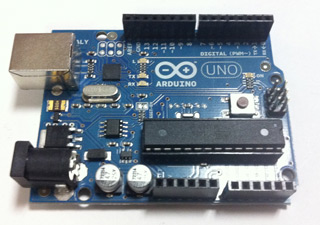 This is the "motherboard" of your ChibiMo.
In fact any type of Arduino can be a ChibiMo though I recommend one of these three because they are very popular and shield kits are widely available.
This is the "motherboard" of your ChibiMo.
In fact any type of Arduino can be a ChibiMo though I recommend one of these three because they are very popular and shield kits are widely available.- Monochrome LCD Module
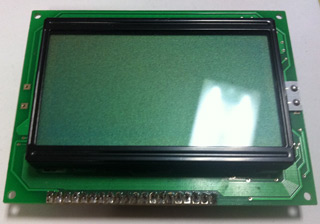 Any LCD that has a resolution of 128 x 64 and that is "compatible with KS0108" will do. You may choose negative LCDs as well.
- Protoshield Kit
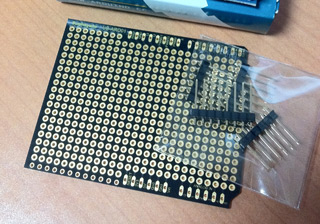 Although ChibiMo can be made just by hooking wires between Arduino and LCD, it looks just a bit nicer if wires are soldered on a shield so that they don't hang around. This one on the picture is UB-ARD01 from Sunhayato.
- 10k-ohm Potentiometer
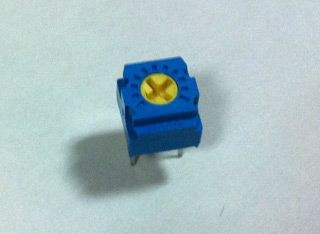 This adjusts displaying contrast of the LCD. This is the only component that ChibiMo needs other than wires.
- Electric Wires
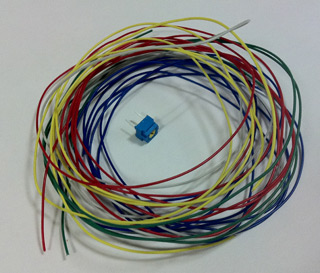 These are the wires that actually connect Arduino and the LCD. Any kind of wire will do as no component needs a high current.
- Pin Headers and Sockets
- You need these if you want to make your shield modular. Choose a one according to your LCD. In most cases you will need a 20-pin single-in-line header and a compatible socket.
- Windows PC
- Since ChibiMo is a PC monitor, you need a PC that tries to display something on it.
Currently ChibiMo is compatible with 32-bit Windows only. It works very nicely with Windows XP, but not very well with Windows Vista or 7.
64-bit versions of Windows is not supported. Therefore I would recommend a PC with Windows XP.
The instruction on this page does not cover Windows Vista or Windows 7.
So please have an XP PC at this moment.
You will also need some tools in addition to the components above.
You should at least have a soldering iron, some solder, and a wire stripper (or a wire cutter).
Step 1 -- Get Yourself Familiar with Arduino
First of all you need to be familiar with Arduino.
You should at least be able to blink the little LED on Arduino board at your desired frequency.
To be more precise, be familiar with the following operations at this point because later steps implicitly include them:
- Install Arduino IDE onto your PC,
- connect your Arduino board to your PC and install the correct driver (if needed),
- make an Arduino sketch and upload it to the Arduino board, and
- check that your sketch is correctly working.
Reading them may seem hard, but actually they aren't, and I believe many of you are already familiar with them.
Please refer to Arduino's web page for detailed instructions.
Step 2 -- Solder Headers or Sockets to the LCD
Get your soldering iron and solder headers (or sockets) to your LCD module.
Whether to solder headers or sockets is totally up to you.
LCD is ready once you have completed this step.
Step 3 -- Build the Shield
Build your ChibiMo shield using the protoshield kit. The schematic is below.
It shouldn't be too difficult to read the schematic, just connect Arduino ports and LCD ports as lines on it suggest.
Do not forget to solder the potentiometer as well.
This step is the most hardest among all steps, so keep it up.
Double- and triple-check ALL connections at this point.
If any connection is wrong and later you power it on, you may end up damaging your Arduino and/or your LCD.
Check that all wires connect the correct pins. Check that no solder points fuse with another.
If you have a circuit tester, don't be lazy to use it.
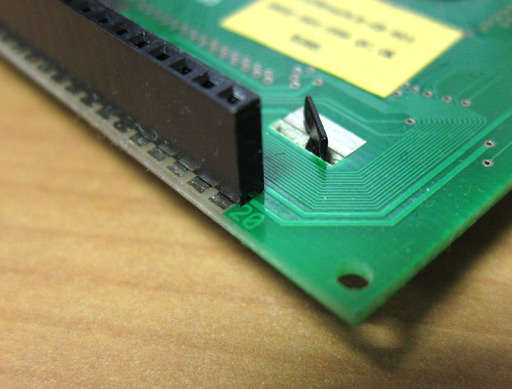
Particularly, be careful about orientation of LCD header since they can be connected in reverse orientation.
The LCD has a small print on it showing which pin is pin 1 and which pin is pin 20, just as you can see in the picture below.
The picture below is example of a completed shield.
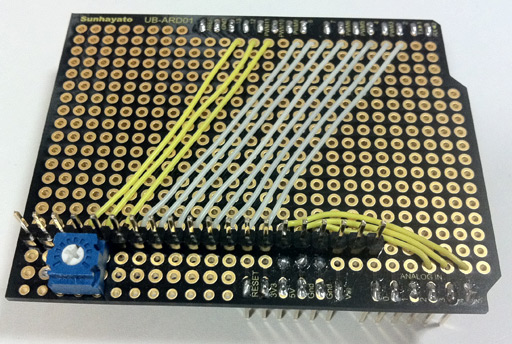
The shield is ready once you have completed this step.
Step 4 -- Assemble ChibiMo
Now assemble ChibiMo by connecting Arduino, your shield, and the LCD module.
It shouldn't be any problem at all, but just be careful not to connect the LCD module the other way around.
Step 5 -- Upload ChibiMo Sketch to Your ChibiMo
Upload ChibiMo's firmware to the Arduino board.
You can download the sketch from here.
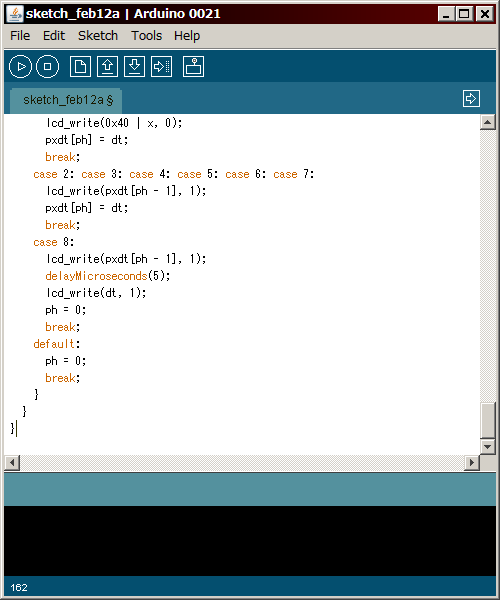
Create a new sketch on Arduino IDE, copy-paste it, and upload.
Your screen will look just as the following screenshot right before you upload the sketch.
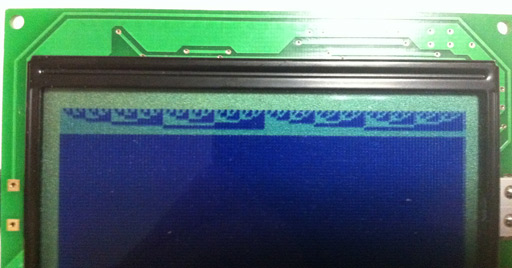
If upload is successful and your shield is correct, you will see a test pattern on the LCD.
The correct pattern is shown in the picture below.
Only top 8 lines are important. Lower part of the LCD may not be all-black.
If the correct pattern is on your LCD, your ChibiMo hardware is now ready.
If you see no pattern or if you see some garbled pattern, something is wrong.
Try the following steps:
- Turn the potentiometer.
- You may be seeing no pattern on the LCD simply because contrast adjustment is out of range.
Try adjusting contrast by turning the potentiometer.
- Try uploading the sketch again.
- Some wrong sketch may be uploaded to the Arduino board.
- Re-check your shield.
- If you see no pattern after trying the steps above, it is most likely that your shield has a problem.
Go back to step 3 and re-check your connections on your shield.
Step 6 -- Install ChibiMo Software to Your PC
Once the hardware is ready, your PC needs to be aware of ChiboMo.
This requires you to install ChibiMo drivers to your PC,
just like you do for any other hardware you buy from PC stores.
I made the driver into an installer package so there shouldn't
be a big trouble installing it. Click the link below to download it.
>> ChibiMo Installer v.20110619 <<
While this installer installs a device driver,
black windows appear and your screen may flicker multiple times.
This is a normal operation.
Your PC needs to be restarted after the installation to activate the driver.
Step 7 -- Activate ChibiMo Display Driver
After you restart your PC you will see your PC has got a new monitor.
However, you need to turn it on manually, since It is turned off by default.
To do this, use Display Property control panel.
As most of you know, to bring up Display Property control panel quickly,
right-click anywhere on the desktop. A menu will come up, then click
"Properties". On the Display Property control panel, select Settings tab,
which you normally use to change resolution of your desktop.
There you will see a new monitor added.
Click on it and check that the name of the screen says "ChibiMo".
Then tick the "Extend Desktop to This Monitor" box and click "Apply".
The box you should tick is marked with red in the picture below.

Step 8 -- Launch ChibiMoCo the ChibiMo Controller App
From the Start menu, launch ChibiMoCo.
It is stored inside a subdirectory named ChibiMo.
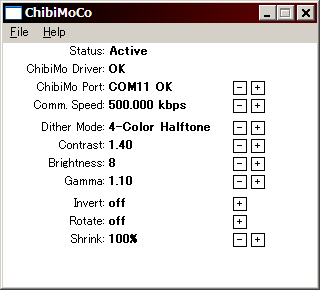
ChibiMoCo's window looks like the picture below.
The first part that you should check is the "ChibiMo Port" option.
Switch this option with "+" and "-" buttons until the status line reads
"Active".
More precisely, this option must match to the serial port number of your
Arduino board.
If the status line reads...
- "Check USB Connection":
- you have your ChibiMo physically not connected,
or your ChibiMo is connected to a different COM port number.
- "Check Display Property":
- you have the ChibiMo driver turned off.
Go back to step 7 and make sure that your ChibiMo driver is turned on.
Step 9 -- Let ChibiMo Be Displaying
At this point, your ChibiMo is ready to display your data.
Try to let something on your PC be on ChibiMo.
For example, try dragging your "My Computer" window onto ChibiMo.
If your ChibiMo is configured successfully, the window will
show up on your ChibiMo.
One thing you must be careful is that current version of ChibiMo
shows only 128x64 pixels of top-left part of the 640x480 virtual
ChibiMo display. Rest of the display will not show up on your ChibiMo.
If you accidentially put your windows in the area that is not
visible through ChibiMo and end up losing them, just turn off ChibiMo's
virtual display driver through display properties control panel.
If nothing shows up on your ChibiMo, you may have configured
your ChibiMoCo wrong. In most cases you have your ChibiMoCo configured
to a wrong COM port. Make sure you have selected the correct COM port
number.
Step 10 -- Congratulations!
Congratulations! Once you have your data shown up on ChibiMo, you completed your ChibiMo.
Terms of Use
- ChibiMo and its software are for PERSONAL USE ONLY.
The author is not responsible for any loss that may be caused by using ChibiMo.
ChibiMo and its software are provided AS IS, and there is NO warranty of any kind.
- At this moment, please do not redistribute ChibiMo's software.
Please provide link to this page if anyone would like to obtain a copy of it.
- If you have completed a project that is built based on ChibiMo or that expands ChibiMo,
I, the author, would be glad to know about it!
Contact Kouichi Kuroi
If you have any comments to the author, please send them to:
e-mail: ko (atmark) q61 (dot) org. (Please substitute (atmark) and (dot)
with appropriate characters.)
Twitter: @q61501331 (I tweet mostly in Japanese,
but feel free to mention me in English.)
What is to be Improved...
The following is the list of functionalities that I would like to implement
into ChibiMo, but that I have not had time to do so yet.
- Auto-detect COM ports with ChibiMo
- Multi-ChibiMo support
- Adjust the resolution of virtual display to the actual resolution of ChibiMo
- English version
- User-configurable refresh rate
- Gadget application
- Make ChibiMoCo an Windows service
- Turn virtual display on/of from ChibiMoCo
- Full compatibility for Windows 7 (which I expect to be very, very costly)
[Back to q61.org]